You can create a Facebook page for your business, place, company, organisation, brand, or product, in order to connect with your customers.
Public figures and celebrities also create Facebook pages to connect with their fans.
Setup a Facebook Page
As you probably know, the majority of Facebook is made up of personal profiles. However, if you’re a business looking to establish your presence on the social network, you’ll need to create a Page instead.
Pages are Facebook’s equivalent of a business profile. Pages look similar to profile pages but show specific information only applicable to businesses, organizations,
and causes. Whereas you connect with a profile by adding them as a friend, you connect with a business Facebook Page by “liking” it and becoming a fan. If you create
a personal profile for your business instead of a Page, you run the risk of getting it shut down by Facebook.
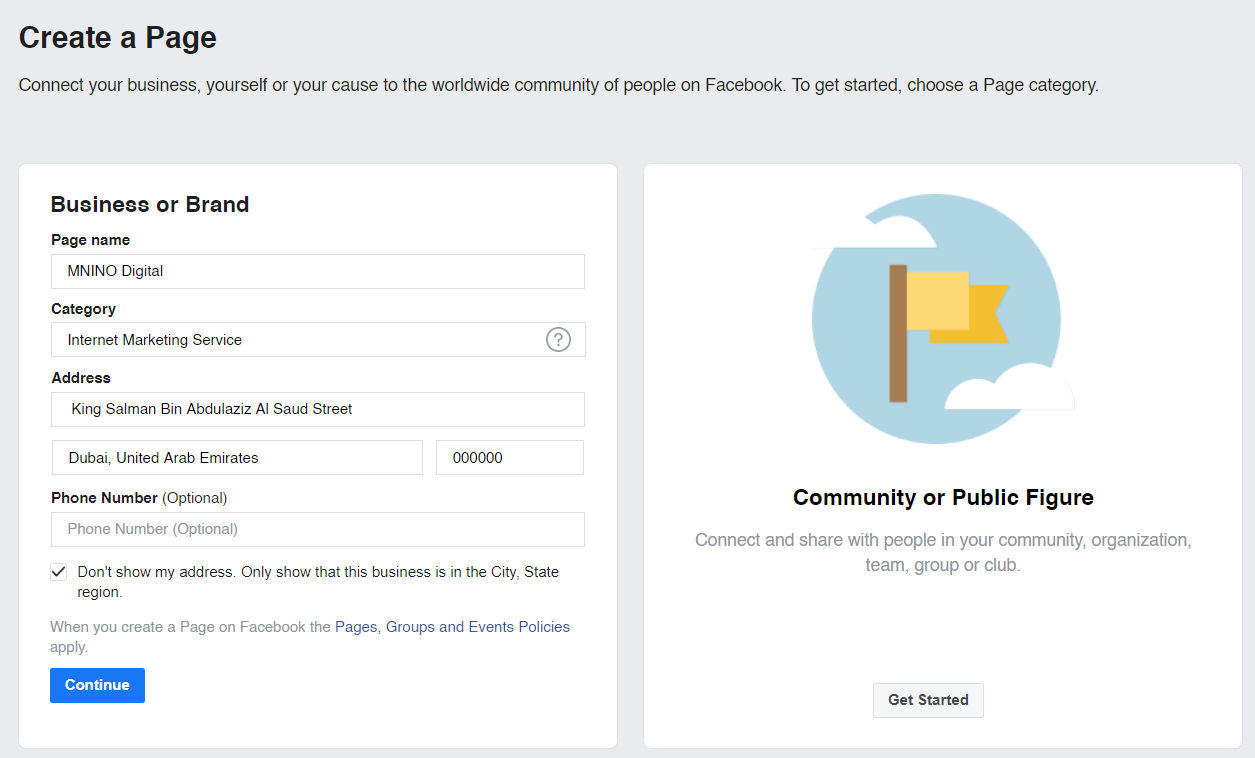
1. Go to https://www.facebook.com/pages/create and select create a Business or brand page or Community or public figure

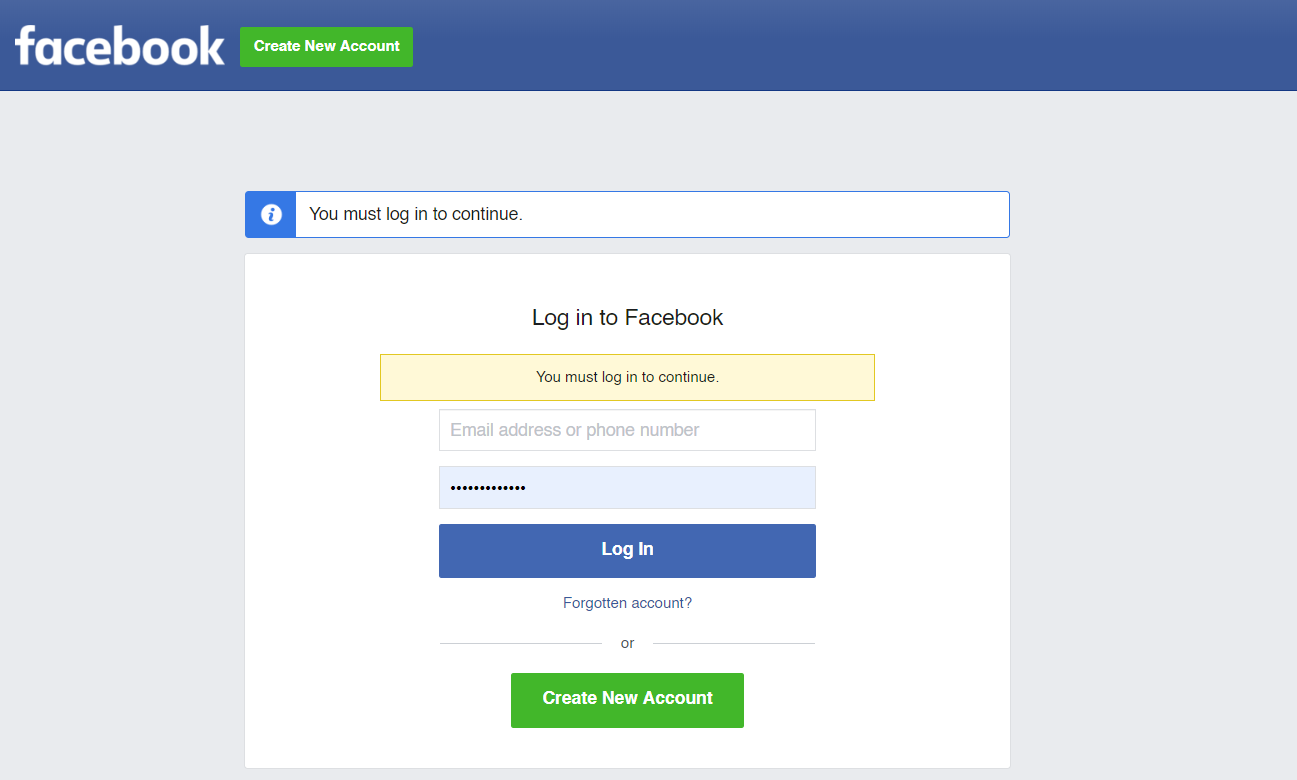
2.Log into Facebook
3.Choose a name for your page, select category and enter your address. You can select the option to keep your address private.
We recommend you choose the name for your Page wisely. Facebook will let you change your name and URL in most cases, but it can be a difficult and tedious process.
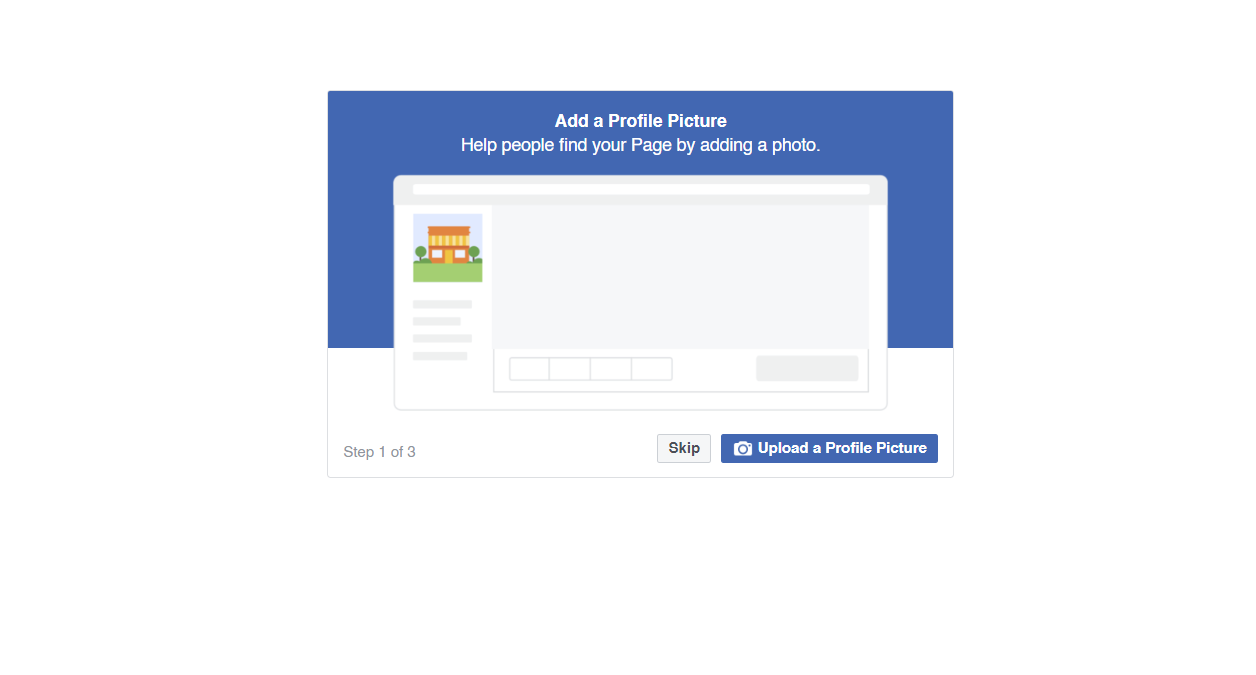
4.Add a Profile Picture
The first step to giving your Facebook Page an identity is adding a profile picture. This will serve as the primary visual for your Page, appearing in
search results and alongside any of your content that shows up in a user’s News Feed. Most publishers suggest creating a photo that’s 180 x 180 pixels,
however increasing this slightly will help maintain quality. If you don’t upload an image that is already square, you’ll be prompted to crop.
Think of your profile picture as your first impression, and be sure to choose something immediately recognizable (like a logo).
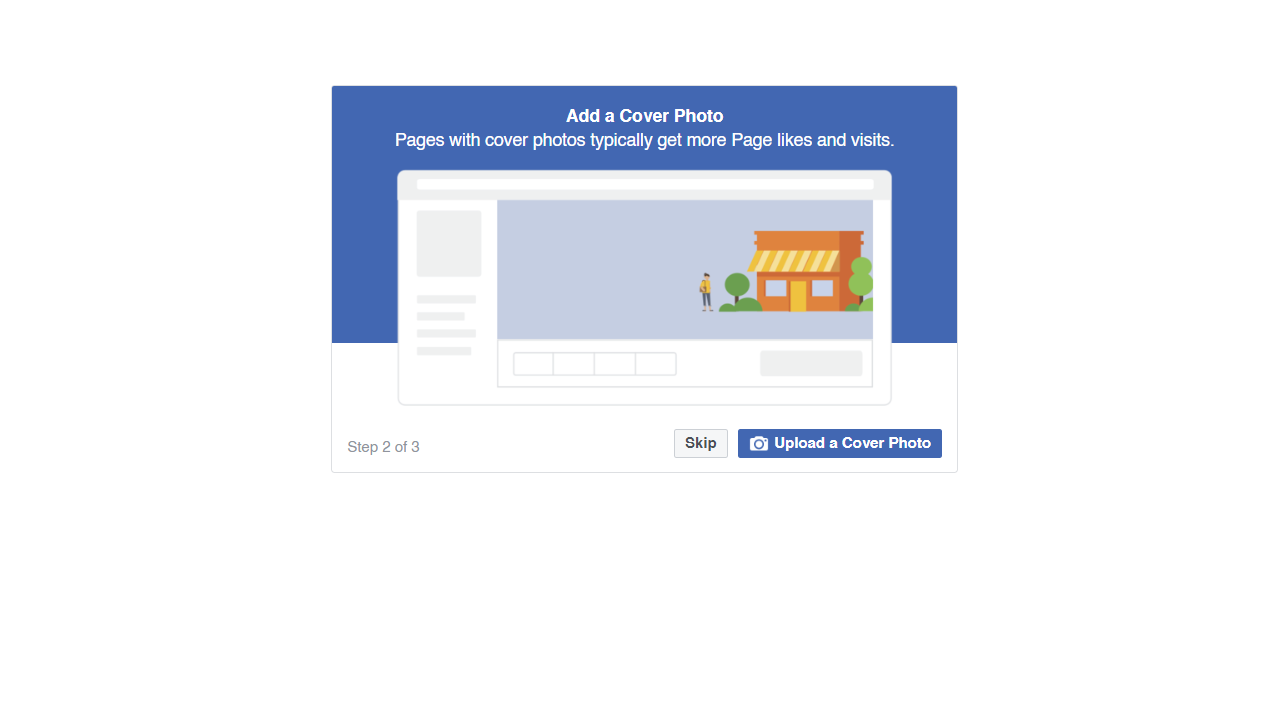
5.Upload a Cover Photo
Next, Facebook will suggest you add a cover photo. A cover photo is the large, horizontal image that spans the top of your Page. It should express your Page’s identity and can be updated often based on special offerings, campaigns, or seasons.
To upload a cover photo, click the “Add a Cover Photo” option in the welcome menu. The official dimensions of a cover photo are 851 x 315 pixels. However, if your photo is not exact, you’ll have the option to drag to reposition the photo. Press "Save".
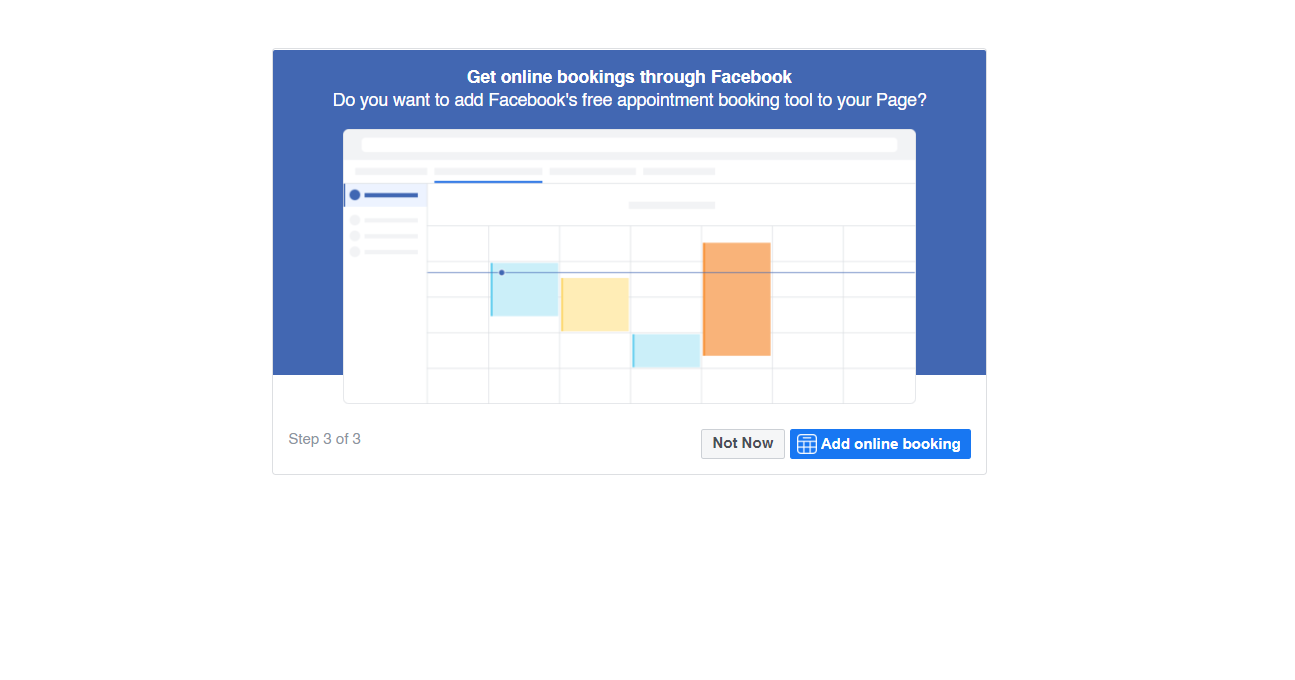
6.Facebook will offer us the possibility to add a free appointment booking tool to our Page. You can choose "Not Now".
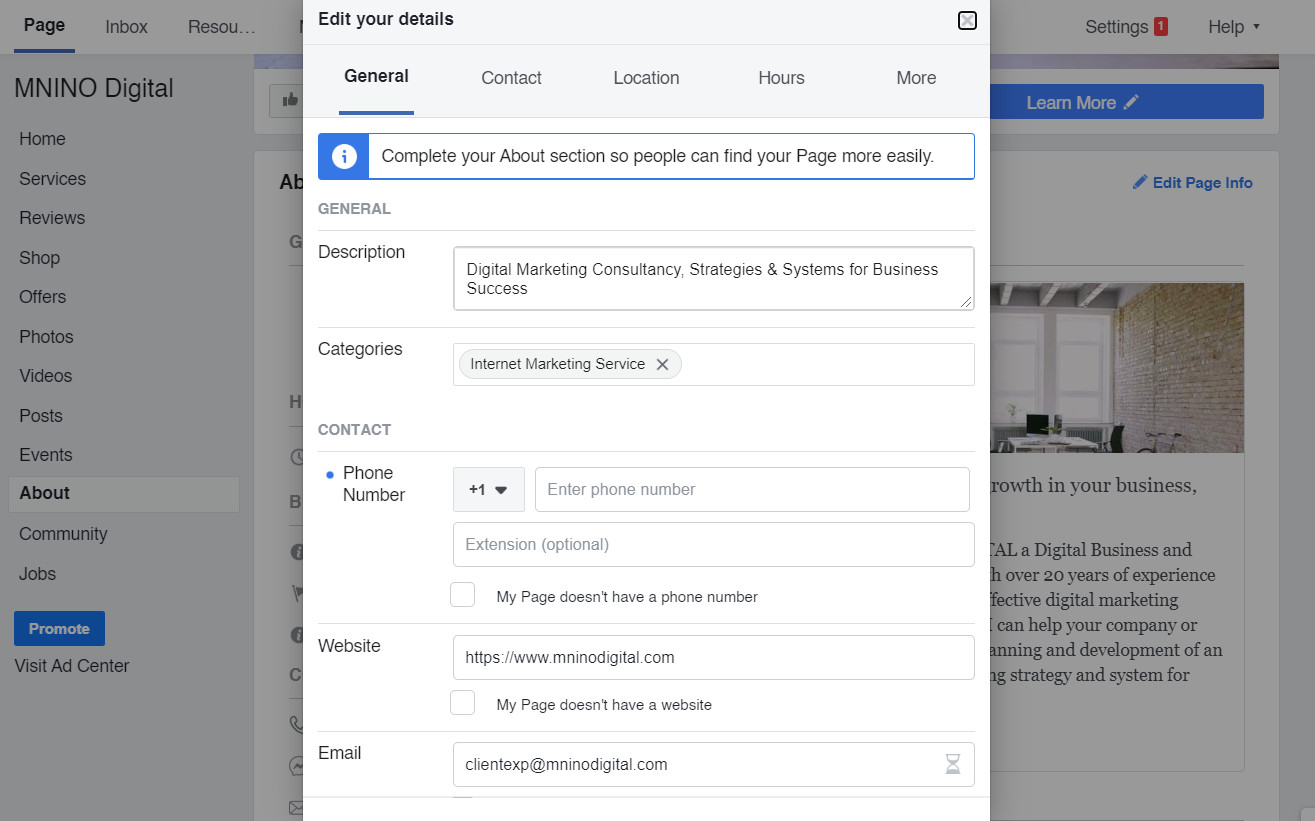
7. Add a Short Description
Your Page is starting to come together with some beautiful imagery. Next, you’ll need a description to let your audience know what your business is all about.
Click “Add a Short Description” under "Welcome to Your New Page"to get started. Add one to two sentences (or 255 characters max) about your business. This description will appear both on your Page and in search results, so keep it descriptive but succinct. But don’t be afraid to show a bit of your brand’s personality!
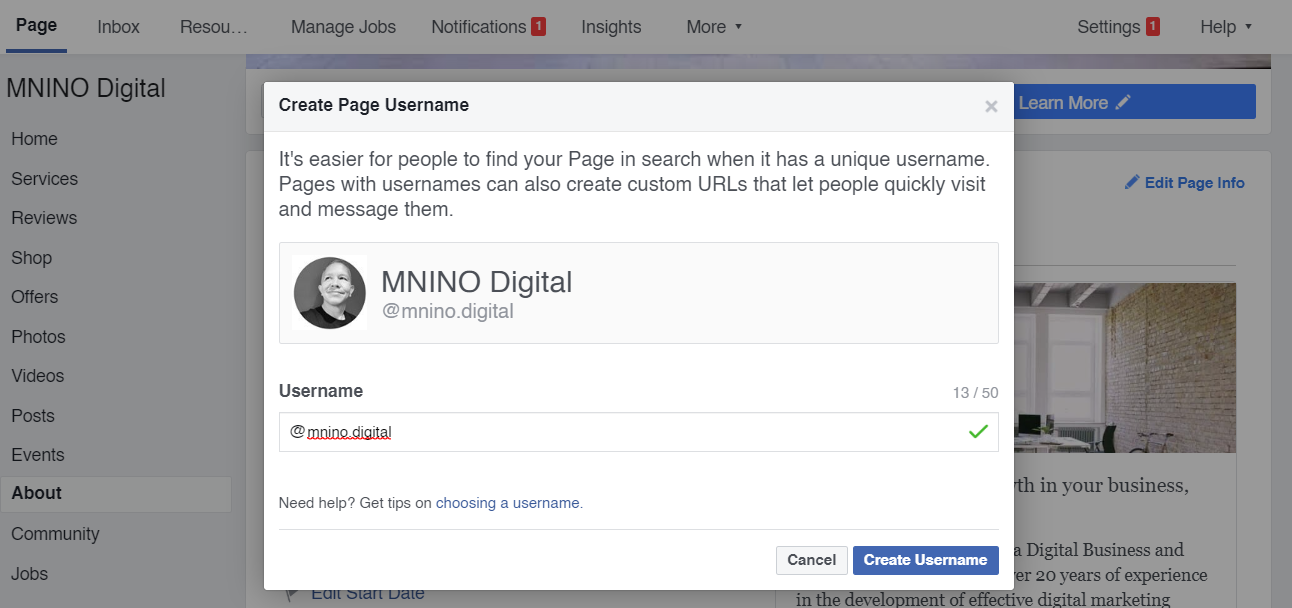
8. Create a Username for Your Page
Your username will appear in your custom Facebook URL (also known as a vanity URL) to help people easily find and remember your Page. You’ll have 50 characters to come up with a unique name not being used by another business.
9. Add a Page CTA
One of the top benefits of having a Facebook Page for your business is the ability to attract an audience you might not have been able to reach with a traditional website. However, the typical buyer’s journey doesn’t end on Facebook.

10.Congratulations, your new Facebook Page is ready.

Unlock exponential growth in your business, sales and revenue with an effective digital marketing strategy & system.
Previous: Benefits of Facebook for Business
Next: How to Get Facebook Likes and Fans